Not so long ago, the only choice of blade you would get at a knife shop was the classic plain blade.
However, now, you have a combination of knives with different blade styles, offering diversified functionality. Just like any other blade, serrated edges do dull with time.
In this article, we discuss in detail the uses of a serrated knife and provide a guide on how to sharpen a serrated knife.
Because sharpening a serrated knife is so different than sharpening a standard smooth edge blade we cover a lot of the different terminology and background of serrated blades.
If you want to jump directly to the how to sharpen a serrated knife portion then use the quick navigation list and select “tips for sharpening a serrated knife.”
Uses of a Serrated Knife
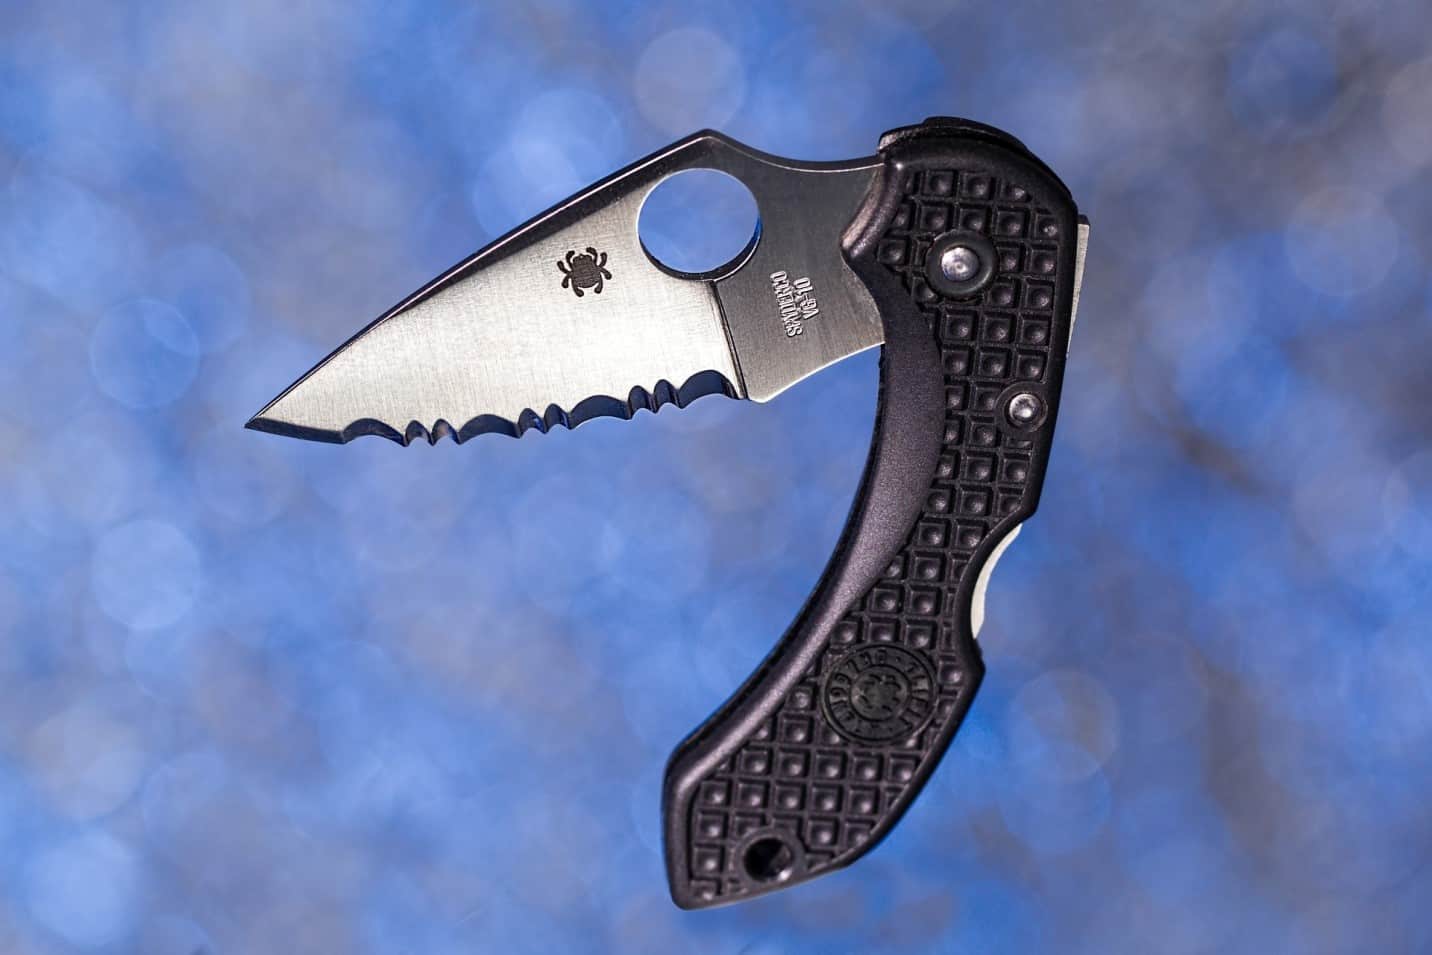
A serrated knife features a jagged edge, somewhat similar to a saw. The difference though, is that the serrated knife is a series of more rounded scallops and inward curved edges between the pointy “teeth” rather than a more blunt series of teeth in a saw.
This helps the serrated edge cut more easily through difficult materials such as rope or even cardboard. It also helps the edge stay working sharp longer than a smooth edge when used on these more difficult materials.
Many people choose to use these as a great pocket knife for everyday use although I still prefer a smooth edged blade for my personal everyday carry knife.
As a survival knife choice, serrated blades work best as they are better at cutting through ropes, and tough fabrics. Should you find yourself entangles in a seatbelt or backpack strap, a serrated blade can come in handy as it rips through material very quickly.
However, a serrated knife is not suitable in all situations and is often not as precise for delicate slicing tasks. It also comes with maintenance challenges to keep in mind, which makes choosing the right blade for the right purpose is absolutely essential.
Push Cuts
A push cut is one where the knife goes straight through the material in one swift motion. It can best be described as the motion used when chopping vegetables. Here, you need a plain razor-sharp edge. It is what cuts through the material in a single push without damaging the structure.
Slice Cuts
Slice cuts are those that require a back and forth motion to cut through a material. Here the material if often layered of fibrous like a rope or cooked meat. Here a serrated blade comes in handy as its coarse edge helps penetrate the exterior while working on many different fibers at once.
Plain vs. Serrated
The debate for which is better has been going on for a very long time. It is safe to say there is no right or wrong answer to the dilemma as each blade serves its own function. Often it also depends upon the material you are cutting.
Smooth Edge Blades
A smooth edge blade is exactly what it sounds like, a standard smooth edge. This is the most common type of knife edge and is usually what most people want on their knives.
A smooth edged blade excels at standard slicing jobs and when it is kept razor sharp is my favorite type of blade edge. With that said, I do also own numerous serrated and combo blades as they each have their own very specific areas where they perform better than a standard smooth edge.
Combination Blades
A combination blade is one with a partially serrated and partially straight-edged blade. They are incredibly useful and are preferred by all adventure seekers out there. Whether you want to go hiking, trekking, camping, or rock climbing, you will need a trusted survival knife to get you through your adventure.
The surface area for both plain and serrated blades is reduced in a combination blade, but it provides double the functionality. The serrations feature high points that puncture the material, allowing you to cut through it more effortlessly. It offers more rigidity and control over the material being cut and can be quite intimidating.
Serrated Blades
For softer material with a tougher outer skin that can be crushed with push cuts, a serrated blade is better, while a plain blade may be better for tough materials that require the exertion of substantial strength to cut through. Carrying two different types of knives with you at all times is a bit tedious, which is why many prefer combination blades.
Where the chiseled serration offer advantages, they can be quite challenging to maintain. Much like any other blade, a serrated knife does become dull over time. To keep the scallops razor-sharp, you will have to refine the edges with one of the many sharpeners available. Here we tell you how to sharpen a serrated knife and essential tips to keep in mind.
How to Sharpen a Serrated Knife
Before you begin sharpening a serrated blade, know that you aren’t dealing with one single blade but numerous serrations at the same time. Running the blade over a whetstone like you would a plain edge knife can ruin it, and that is why many believe that it cannot be sharpened.
However, with the right sharpener, you can easily restore glory to your serrated blade.
Serrated Knife Sharpeners and Sharpening Systems
There are various serrated knife sharpeners available in the market. Some of the most popular sharpener materials are diamond, oil stones, and ceramic sharpeners. You also have various sharpening systems and devices that you can use to get that razor-sharp edge on a serrated knife.
Like mentioned above, if you try to sharpen your serrated knives on a standard flat sharpening stone then you will harm your edge more then sharpen it. Because of that, we recommend you get a specific serrated knife sharpener that will help you get that jagged sharp edge back.
We list a few of our favorite serrated knife sharpeners below to help you make a quick choice, however, if you want to read our full guide on how to choose the best serrated knife sharpener you can check it out here.
Spyderco Sharpmaker
Using a Spyderco Sharpmaker is slightly more complicated than sharpening rods and files. That said, it is my favorite tool for sharpening serrated as well as smooth edge knives. It takes a little bit of learning but once you get the hang of it you can easily maintain all of your knives edges to keep the razor-sharp.
Here you have rectangular attachments that you will insert in a base that keeps them stable. You will place one rectangular insert with its pointed side facing outwards and another with the flat side facing forward.
First, you will place the end of the serrated side of the blade toward the attachment with the pointed side and pull it towards you. Then place the straight edge of the blade towards the flat attachment and pull it towards you.
Make sure to keep the blade at a slight angle when running it through both sides and repeat the process about five to six times. Take extra care, especially when working on the flat side, as you want to sharpen the edge but not scratch the back of the blade.
Lastly, you will run both sides over a leather strap to further polish and remove leftover debris from the sharpening process.
A Spyderco sharp maker is an ideal tool to have as it works on all sorts of blades. It is faster than a sharpening rod and is just as efficient. If you are someone who is a sports enthusiast or someone who regularly utilizes a survival knife, then a Spyderco sharp maker is the best choice.
EASY TO USE, OUTSTANDING RESULTS – This has everything necessary to sharpen any type of edged or pointed tool in just a few minutes time. Simply keep the plane of your knife’s blade vertical and draw the edge along each stone to sharpen.
DURABLE DESIGN – The Sharpmaker has an ABS plastic base/storage case and contains keyed holes that accurately set the stones’ sharpening angles at a 30-degrees or 40-degrees.
READY TO GO – All components snap into the self-contained ABS plastic base and lid – it is ready to travel with you.
SHARPENER FOR THE NOVICE – Every Sharpmaker comes complete with a detailed instruction book and DVD that guides you step by step through the process of sharpening knives, scissors, awls, and many other tools.
INCLUDES – Instruction book and DVD. Medium and fine triangular ceramic rods for aggressive sharpening and professional-grade finishing.
Also Available
At Blade HQ
Universal Lansky Sharpening System
The Universal Lansky is another investment-worthy sharpening system. It comes with a knife clamp, angle selector, four sharpening hones, including one for medium serrations, and four guide rods. It offers four sharpening angles at 17, 20, 25, and 30 degrees, respectively.
Place the knife in the clamp so that the serrations are facing upwards and away from the clamp.
Find the angle of the bevel by placing the sharpening hone through the guides and identifying the one that best matches the existing slope.
Place the sharpening hone of choice through the guides and slide it over the serration in one direction a couple of times.
The system comes with a honing oil to enhance efficiency and give you the desired result. Make sure to remove the burr when you are done by running it over a leather strap or running the hone over the back of the blade a couple of times.
Ideal for keeping blades of all kinds sharp.
Complete sharpening system from Lansky includes all of the tools you need for regular sharpening maintenance of your straight edge, serrated, and scalloped edge blades.
The set includes four hones: medium serrated edge, coarse, medium, and fine; a multi-angle knife clamp; specially formulated honing oil; a molded storage/carrying case; and complete instructions.
Use this kit on your kitchen, utility, hunting, or fishing knives to maintain their sharp edges and maximum cutting ability.
Made in USA
1 year manufacturer warranty
Also Available
At Blade HQ
Diamond Sharpeners
They are the most efficient knife sharpeners and offer the quickest and easiest material removal, among other sharpeners. There are various diamond sharpeners in the market that you can use for serrated knives. Here are a few:
DMT Diafold
DMT Diafold Serrated Knife Sharpener is an excellent choice. It has a cylindrical diamond surface infused with micronized monocrystalline diamond. It features a tapered edge design, which makes it suitable for serrations of all sizes. It is the one tool you need to sharpen all your serrated knives.
cone tapers from 1/4 to 1/16 diameter for sharpening serrations of all sizes or straight edge knives.
Portable, lightweight with convenient fold & go handles which enclose and protect the diamond serrated sharpener when not in use
Fine diamond for a razor sharp edge.
Sharpens knives faster than conventional stones with DMTs monocrystalline diamond surface
No oil is needed-sharpen dry or with water
Durable construction will provide years of consistent performance and reliable service
Also Available
At Blade HQ
Schrade SCHDDS Diamond Sharpening Rod
The Schrade SCHDDS sharpening rod is much like the DMT Diafold. It also features a tapered edge rounded barrel to help chisel off each scallop efficiently. It is also pretty compact so you can carry it around on your excursions.
DIMENSIONS: 3.3 inch (8.4 cm) rod length with a handle length of 1.4 inches (3.6 cm) and a weight of 1.2 ounces
DURABLE: Rod is made of reliable 180 Grit
DEPENDABLE: Quick and easy access with the convenient pop off top for instant use whenever needed
SECURE: Have confidence that the rod will always be in place by using the pocket clip while storing
BE PREPARED: Rod is small in size and can be stored easily during transport, but is the perfect size for sharpening regular blades and serrated blades while on the go
Also Available
At Blade HQ
Oil Stones
Traditionally oilstones or whetstones come in a rectangular block form. Using those to sharpen your serrated knife is not a good idea as they can shave out the scallops producing a clean plain edge blade. However, there are round barreled oilstones known as files that you can use to sharpen out a serrated knife.
Round Arkansas File
It is used to sharpen various knives and tools and can fit easily in curved edges of a serrated knife. It works particularly well for bread knives that don’t need a very aggressive filer as it can effortlessly sharpen their edges in a few single files. For survival knives, you will have to go over a few extra times with the round abrasive file to get the razor-sharp edge.
You can use the smaller round Arkansas file for smaller serrations if your knife features different sized scallops.
Ceramic Rods
Ceramic sharpening rods are pretty similar to diamond sharpening rods in terms of appearance. The major difference between the two is in terms of texture. Diamond rods are coarser and are more aggressive, which makes them ideal for re-beveling and sharpening an extremely neglected knife. Ceramic rods, on the other hand, are ideal for touch-ups and regular maintenance.
Dowels and Sandpaper
Not everyone is a knife enthusiast willing to invest in a knife sharpener. If that sounds like you, then you need not worry. You can use s dowel with sandpaper as it works much like an abrasive file. You can buy a few dowels in different sizes.
Make sure you have one thin enough to fit into the bevels at the tip. Tightly wrap an emery cloth around a dowel that fits the serration and use it the way you would use a sharpening rod.
Tips for Sharpening a Serrated Knife
When using any sharpening device, make sure to place the knife of a surface with the tip pointing away from the body. Then slide the sharpening rod, file, or dowel through the bevel to sharpen the serration. Keep the following tips in mind.
Several Edges on One Blade
Know that you aren’t dealing with one edge to sharpen. You will be refining multiple edges over the length of the blade. Each curved edge needs to be razor-sharp for the knife to work efficiently.
Angle and Size of the Serrations
Not all scallops on a serrated blade are the same size. Some might be thinner, while others may be wider. Designers create differences to add character to the knife and enhance performance for some particular functions. When sharpening the blade, make sure to match the angle of each bevel. Use the existing slope as your guide.
File in One Direction
Once you match the angle of the bevel, make sure you move the sharpener of your choice only in one direction. Pushing the sharpener away from your body is the best move as it is safe and allows you to maintain a firm grip over the knife. If you file back and forth, you could end up slicing away a substantial part of the blade, which could ruin its efficiency.
Work on One Serration at a Time
Working on one serration at a time can be time-consuming, which is why many tools offer an alternative. However, amateurs run the risk of permanently ruining the blade by trying to hasten the sharpening process.
It is best to patiently go over one scallop at a time, making sure to match the angle while sliding the tool away from your body. Even though it takes time, it provides the best result.
Progress From Coarse To Fine Grits
As with sharpening a smooth edge blade we often start at a coarser grit and work our way through to the finer grits. By doing this we progress faster than just using a fine grit stone and also produce a finer edge than just using a coarse grit stone.
Although, if you do not let your edge get too dull before sharpening it can usually be sharpened quite easily with just a medium or fine grit sharpener.
Finish by Removing the Burr
Almost all serrated blades are flat on one side. Once you are done sharpening the scallops, you should always apply the finishing touches for a razor-sharp finish. Do that by turning over the knife and running the sharpener over the blade on the back. A few slides are enough to level out the edged from both front and back.
You can also use a leather strop for the finishing process. Running your blade over one can remove the burr and add a nice shine and polish to the knife.
Keep in mind that a standard flat strop will not get into the scallops and grooves of your serrated blade. However, with a bit of care and practice you can use the edge of the strop to work the scallops and then strop the back or flat side of the blade as you would a standard blade.
FINAL VERDICT
A serrated blade makes for an incredibly handy pocket or survival knife. It is also a common kitchen utensil ideal for slicing through bread and cutting through other fibrous materials and food items.
Our guide on “How to Sharpen a Serrated Knife” is meant to be a guide for all those looking for serrated knife sharpening techniques.
Spyderco Mule Team Project
The Spyderco Mule Team Project is a unique program designed to get new and exciting types of blade steel into the hands of hardcore
Best pocket knife for dress pants
Best Pocket Knife For Dress Pants: My Top Choices! I am definitely more comfortable in jeans and a T-shirt, however, when I need to
5Cr15MoV Steel: Full Details And Review
5Cr15MoV Steel For KnivesHave you been looking for a knife recently and come across blades made out of 5Cr15MoV Steel? Do you want to
VG-10 Steel: Full Details And Review
VG-10 Steel ReviewDo you have a kitchen knife made out of VG10? Or maybe you recently got a folding knife from a reputable brand
Best Backpacking Knife : How To Choose The Right One
How to Choose a First Timer’s Best Knife for Backpacking Backpacking is an amazing experience, but having the right tools is essential to your
9Cr18MoV Steel: Full Details and Review
9Cr18MoV Steel For Knives Do you have a knife made with 9Cr18MoV or are thinking of buying one? Do you want to know how
420HC Steel: Full Details and Review
420HC Steel For KnivesDo you have a knife made out of 420HC steel or are thinking of buying one and are wondering how it
440A Steel : Full Details and Review
440A Steel For KnivesIn this article, we will review the 440A steel – its compositions, properties, equivalents, as well as sample 440A steel blade
7Cr17MoV Steel: Full Details and Review
7Cr17MoV Steel For KnivesIn this article, we are going to review 7Cr17MoV steel – its chemical composition, properties and how it compares with similar